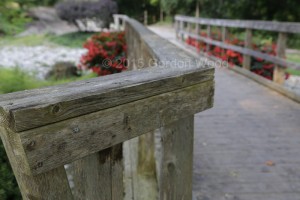
When we think about creating a photograph with everything in sharp focus from a few centimetres in front of the lens out to the horizon, we immediately think that we will need to ‘stop down’ to an incredibly small aperture and focus at the hyperfocal distance. Unfortunately, that means we will have to use extremely long time exposures to make up for the light lost with the small aperture, and who knows where the hyperfocal distance is anyway?!
You could invest heavily in a tilt/shift lens instead, but there is a way to use your current lenses to get this result. I am going to describe the procedure on the assumption that Photoshop is available to you, but there are inexpensive software packages available as well to perform what is referred to as focus stacking (Google it).
Before we get to the software, let’s outline the image capture procedure. The idea is to capture a number of images of the same scene (a tripod is a must for this), successively refocusing from closeup to infinity in small steps. The successive images must overlap in terms of focus. For this reason, it would be wise to use a fairly small aperture (like f/16, if the light allows), in aperture priority or manual mode, to give each shot as wide a depth of field as possible. Small focus steps will ensure the in-focus zones from one shot to the next overlap each other. This will require some experimentation with your lens. Take as many shots as you want. This will guarantee a good result, and the software will have no problem handling them.
Note that as you refocus, the size of the image changes slightly. For that reason, the first job of the software is to align all of the shots based on their content. Because each shot contains zones that are out of focus, the next job of the software is to blend the images together while removing the defocused zones from each.
When aligning the shots, the software creates a layered file comprised of each shot on a different layer (hence the ‘stacking’ term). To eliminate the defocused zones, it adds a mask to each layer which blocks out these zones individually.
So here are the steps I use in Photoshop. It is possible to align and blend all shots at once, but I found it gave me screwy results. Instead, I do the following:
1. Open all of the shots in your sequence (at the same time to save time)
2. Select File > Automate > Photomerge.
3. Under Layout in the dialog box, select Collage. Under Source Files click Add Open Files. Uncheck the Blend Images Together box (I do this to avoid the aforementioned screwy results). The software creates a new, layered ‘Panorama’ file with content on all layers now aligned. Note that you will probably have to crop the edges where overlap did not occur.
4. Highlight all layers using Shift-Click or Ctrl-Click. Select Edit > Auto-Blend Layers…, then check the Stack Images radio button and OK.
Now here’s where it can get a little tricky. If you zoom in to the resultant image and find some soft-focused areas, it means Photoshop didn’t quite get the masks right in that area. If you find a number of these areas, the fix will take time and patience. You can turn layers on and off by clicking the eyeball icon on each layer. With all layers turned off except one, you will clearly see where the mask on that visible layer has eliminated part of that layer (checkerboarded areas). By stepping this way through all layers, you will see where the trouble spots are. You may need to erase these areas from one mask (where Photoshop has left in a defocused area) and add to the mask on another layer where that area is in focus.
How do you subtract from or add to a mask? Click on that mask (the rightmost rectangle on a layer), select the Brush tool from the tool palette and choose the white patch from the bottom of the palette, and paint the image. You will see this reveals more of the image on that layer; in other words, it is removing part of the mask. To cover up part of the image on a layer (in this case, a defocused area for instance), use a black brush. Adjust the size and hardness of the brush to get the desired control. As I said, this can involve a lot of work.
The sample images here show the first and last images in a stack sequence, and the resultant focus-stacked image. The actual number of images in the stack was 11, but the first and last images demonstrate how the background and foreground, respectively, are distinctly out of focus. All shots were made at f/6.3, so each has a shallow depth of field. Despite that, the resultant image looks terrific.


Of course, if you have decent light you could avoid using focus stacking by using a very small aperture such as f/22 and focusing at hyperfocal distance. But this too requires skill in determining the right focus point.
Focus stacking may be too over-the-top for many, but if you are passionate about pushing your photography up a notch, your efforts will be greatly rewarded by trying it.